 Home
 Back
 Forward
 Print
Enter a new Residential Buyer Enquiry
This area allows you to create a new prospective Residential Buyer Enquiry record. Before adding a Residential Buyer Enquiry the prospective Buyer must exist in the system as a Contact or be entered as a New Contact. See Enter a new Contact (Person). You may add more than one buyer requirement to a single contact. It is suggested that when a buyer purchases a property, whether from you or another agent, or no longer intends to purchase a property, that the requirements’ status are changed to OLD. See: Remove Buyer Requirements
1. Click on the Contacts Function/Menu button.
2. Select the Sales Enquiries General Option Button.
3. Ensure the appropriate Residential Department is displayed/selected in the Department
Drop Down list.
4. Click on the New Enquires General button.
5. The Residential Buyer Enquiry form will be displayed.
CONTACT SECTION
6. In the Last Name Field begin typing in the contacts Last Name (Surname) as a quick search to
see if they appear in the Data Base. If the Contact appears click once to select them and their details will appear in the Contact section of the Residential Buyer Enquiry Form.
7. To view the Contact’s details click on the  icon.
icon.8. If the Contact does not appear in the search then click out of the contact search box and fill out
the relevant contact details in the Contact section of the Residential Buyer Enquiry Form.
To enter the contacts address details click on icon. Enter the address details and then Save & Close.
To enter the contacts address details click on
icon. Enter the address details and then Save & Close.9. By clicking on the SMS or E-mail button you can send an SMS or E-mail directly to the
contact/buyer. See SMS regarding enabling this feature.
ENQUIRY SECTION
10. Enter the Staff member looking after this Buyer’s enquiry from the Staff Drop Down List. Note:
If a Sales Person is logged in adding a Buyer Enquiry their name will auto-fill with their staff code.
11. The Date Entered will default to today’s date – change this if necessary..
12. Select the Motivation from the Drop Down List.
Note: The system will default the motivation to High when entering buyer enquiries.
13. Enter the Required After date. Note: This date will default to today’s date, if the buyer does
not want a property until next year, enter the forward date, the system will not perform any checks on this buyer requirement until one month prior to that date. By leaving the date as today’s date you are assured that the buyer will be included in any buyer searches.
14. The Status will default to Current.
15. By clicking on the SMS to Staff or E-mail to Staff button you can send an SMS or E-mail
directly to the staff member assigned to this buyer. See SMS regarding enabling this feature.
16. Accepts Email Alert - This will check box will automatically tick if the buyer has a valid
email address entered and has Accepts E-mail check box ticked in the contact screen. This will then look for NEW listings to automatically match each evening and email a strip list or HTML brochure to them. The Buyer Alert feature set up needs to be enabled first.
17. Referral - Records clients who refer a buyer to your agency. The referrer must be a contact in
the database. The system will record the number of referrals each time a new referral is added and the details of each referral will be recorded on the associations page of the referrer contact.
18. Enter any Staff Notes – these include any details the Staff member would like to record. e.g. –
Elderly couple – prefer no stairs.
19. Enter any Client’s notes – these include any details the buyer has included in addition to their
requirement. e.g.: Wheelchair access, close to amenities etc.
20. Accept single new listing information by - The contact can define whether they want all new
listings that match their requirements within the buyer alert to be sent via email and/or SMS. Click on the  icon to drop down andd select Email and/or SMS.
REQUIREMENTS SECTION
1. Enter the Price from
2. Enter the Price to
types can be selected.
4. Select the Investment checkbox if the buyer is looking to purchase a property for investment.
5. Select the Location Zone from the Drop Down List.
6. Enter a Suburb/s if the buyer is only interested in a property in that suburb or suburb/s.
Under the Suburb column, use the Drop Down arrow to select the suburb or alternately if it doesn't appear in the list type the suburb name and click on Add.
7. Ensure the Must Have checkbox is selected if this suburb is essential in the search. Otherwise
remove the tick in this checkbox to indicate this buyer’s preferred Suburb/s but are not necessarily essential. This is basically their wishlist.
8. In the Improvements area select the Style from the Drop Down List, if desired.
9. Enter the minimum number of Bedrooms, select the Must have checkbox only if this is an
essential requirement.
10. Enter the minimum number of Ensuites, select the Must have checkbox only if this is an
essential requirement.
11. Enter the minimum number of Parking bays, select the Must have checkbox only if this is an
essential requirement.
12. Enter the minimum Land Area, select the Must have checkbox only if this is an essential
requirement.
13. Enter the minimum Internal Area, select the Must have checkbox only if this is an essential
requirement.
an essential requirement.
essential requirement.
16. Select the Study checkbox if applicable.
17. Select the Pool checkbox if applicable, select the Must have checkbox only if this is an
essential requirement. If a Pool is definitely NOT REQUIRED, you may deselect the Pool Checkbox and also select the Must Have checkbox, this facility denotes that NO POOL is essential.
essential requirement. If a Renovated property is definitely NOT REQUIRED, you may deselect the Renovated Checkbox and also select the Must Have checkbox, this facility denotes that NO RENOVATED PROPERTIES is essential.
20. Continue to enter additional information on the Listings Criteria Tab and Match with listings
or click on Save and Close to save the information entered. Alternatively click on the X at the top right corner of the Active screen, a message will appear “Do you want to save changes?” Select Yes, No or Cancel accordingly.
Listings Criteria Tab
This area allows you to record additional filtering options when searching for available listings from the buyer area. Note: Any information entered in this page will lessen the number of listings found suitable for this buyer.
1. Select the Agency from the Drop Down List if required.
2. Select the Department from the Drop Down List if required.
3. Select the Employee from the Lister’s Drop Down List if required.
4. Select the Sale Method from the Drop Down List if required.
5. Enter the Date Listed between dates if required.
6. Enter the Listing Expiry between dates if required.
7. Enter the Auction between dates if required.
Activity Plans Tab (appears once the Buyer Enquiry Form is saved & closed then reopened)
1. The Activity Plans area displays any Standard Activity Plan that has been attached and
lists both the start and end dates. If there is no end date displayed, this denotes that the Standard Activity Plan is still open.
2. The Activities (tasks) area will display any Tasks assigned the Buyer, i.e. whether they are
deleted, in progress, not started or completed. It displays the due date as well as any notes regarding the Task.
Properties Inspected Tab
This screen displays a list of properties that the buyer has inspected including; Date, Time and Comments made. See: Enter a Buyer’s Property Inspection (using the Calendar)
Matches Tab
This area displays the results of search criteria entered for the Buyer.
1. All matching records will display in the grid.
2. Untick the Select Check Box for any listings you wish to exclude for this buyer.
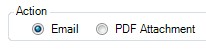
buyer for all the selected listings.
Note: The HTML strip list displays the detail from the Properties >Listings > Advertising >Web Details
page for each listing included in the strip list. If a Listing web URL has been entered for a listing Properties >Listings > Advertising >Links>Listing Web Pages the buyer can click on the link contained in the email to view the listing on the website and display more details for a particular property. If a URL has not been entered the link will display a predefined template.
4. Alternatively select the PDF attachment option button to send a PDF strip list for all selected
listings as an attachment.
Note: The PDF attachment uses the LIST023 – External stock list by property type with property description which must be defined in Administration >Setup >Setup Tables >Standard Reports – Residential
Listing – Strip List.